-


[Guide] RX8 Seats conversion
Overview
This guide will show you the basic method of installing RX8 Seats into a mk1.
The same method can be used for installing MK2 seats, and that's an important detail, I had Mk2 seats fitted already, however, the process is exactly the same. You could also use this guide for fitting mk7 Celica seats, S2000 seats, and Mk3 seats.
What you'll need to buy
- A pair of RX8 Seats... duh!
- Some MK1 seat rails, or MK1 seats you are planning on throwing away.
- A pair of RX8 Heated Seat Switches (and connectors with some pig tails)
- A pair of 30A fuse equipped relays (and a 20A fuse)
- Some 2.5mm automotive cable (3m of red, 1m of black)
- Some type of connector system with crimp terminals
- Some 6.3mm spade terminals (female) or use the ones in the connector kit. Or some relay flying sockets
- At least 8 pairs of m6 nuts and bolts, only 10mm long.
- Can of black paint, try to get the stuff that bonds to bare metal. (or get a can of zinc primer too)
What tools you'll need
- A welder of some kind, I used a stick welder and some 6013 rods.
- A grinder, with cutting discs, a metal grinding disc, and a flappy disc.
- A drill, and some metal drills. (6mm drill mainly)
- Measuring / Marking equipment
- Wire strippers
- Crimping tool for the terminals you're using
- Various Screwdrivers
- Allen keys / Spanners / Sockets
- Electrical tape, and heat shrink
- A sharpie / Marker pen
How To - Part 1: Passenger Side
Compare Seats
Let's start with a quick comparison, Mk2 seats vs RX8 seats:


The biggest factor is the distance between the rails, so double check that yours are close, just encase Mazda made different sizes of seats... for some reason.
MK2 Seat

RX8 Seat

You can see that the rail centers are within 10mm, this is excellent! It will fit... but we already knew that, otherwise I wouldn't have made a guide.
Remove Airbag
RX8 Seats came with a small explosive attached to the side of them. I don't know about you, but I'm not very comfortable with live unprotected armaments inches away from my face, so I've decided to remove them. You could argue that other cars have them, and they are fine; but when they are plugged into an SRS system, they have voltage sinks to stop them going off on their own.
Firstly, a warning.
AIRBAGS EXPLODE WHEN ANY VOLTAGE IS APPLIED TO THEM
There are countless stories of this happening to people so take all due care and attention
Also: if you follow this guide you will have a pair of airbags that you'll need to dispose of. Obviously I would recommend you take these to a suitable local disposal site that can deal with them.
Using a flat head screwdriver, or a trim removal tool, pry open the SRS tab

Using a 10mm socket, on an extension, undo the nut inside the hole behind the SRS tab. Remove the nut buy holding it in the end of the socket, or using a magnet.
Then pull the top of the airbag cover, there are two lock tabs holding it in place.


Once it opens as far as the picture above, you can insert a small flat head screwdriver into black lock tab on the top of the yellow connector. Flick the black bit off, and pull the yellow connector out.
Then pull the airbag up, and it will come out of the hole.
Now the airbag is out, we want to pry the metal cover off the top of it, as it's necessary to hold the panel in place properly.

To do this:
- Undo the 3 10mm nuts
- Using a prying tool, pull plastic/rubber type material over the top of the metal tabs on the 3 sides.
- Using a screwdriver / pliers, lever the lock tabs out against the metal body.
- Lift the metal plate off the top of the airbag
- Gently remove the airbag out of the rubber case, and place it somewhere safe.
- bend the metal lock tabs back using a pair of pliers on the one side.
- Insert the metal plate back in the rubber assembly.
- Pull the rubber tabs back over all the metal tabs around the other 3 edges.

Okay, now you can put the cover back in the seat, do the 10mm bolt up, and put the SRS tab back in place. Do the same thing on the other seat, and that's the scary part complete.
Make sure you place the airbags far away from where you're going to be doing the next steps. We're getting the grinder and welder out, and a wayward spark might cause some brown trousers and a hearing aid appointment.
Removing Feet from mk1 rails
The mk1 rails have 4 feet, each is held in place with a large rivet, and a small bead of weld.
To remove them you need to drill / grind the rivet off, and cut along the weld seam. Make sure you don't damage the foot in any way.
This is a picture from my archive of the MK1 rails before I did my mk2 conversion. You can see how they are attached.

Make sure you label the location of each 'foot' FR - Front Right, RL - Rear left, etc..
Also, do one seat at a time, leave the other one complete until you attempt it.
They should look something like this after a bit of a clean up


Put those to one side, as next we need to:
Removing Feet from RX8 rails
Now these are great if you were frustrated about not being able to hack off the MK1 feet.
The RX8 seat feet are held on with two large rivets, and they are thick boiz.

the best way to remove them is to take an angle grinder to the sides of the feet, and remove the tops. Then using a cutting disc, come in on the side of the rivets and lop the tops off.
Then switch to a grinding disc and take the rest of the rivet off so it's flush with the metal.
And finally you can hit them with a large hammer, which should knock them off. If they don't, you need to grind the rivets down more.
Whilst you're removing the feet, lop off the large pegs on the bottom too. At the very least lop off the really long one on the passenger side.
Lastly, knock the rivets out the other side and throw it

Seat belt connector
Before charging in to the feet installation, there's one final thing on the seat's that isn't required. The seat belt connector, and it's wiring.
Follow the wiring around the 4 pin connector on the bottom, and unplug it

Unpick the cable ties, and push the wiring out towards the seat belt (or cut it!) and then undo the 17mm bolt holding the seat belt connector on.

Then throw it that straight
Installing the feet onto the rails
This is the luckiest part of the entire installation, the front rivet holes are exactly in the correct location. For now don't get the welder out, just use 2 m6 nuts and bolts (I used some stainless countersink heads to aid assembly as they are nice and low profile)
Bolt the front feet on, make sure you've got the orientation the right way around.


Even luckier the rear outermost large rivet hole (4th hole down) is the perfect location too, so get that one bolted on.

Annoyingly this means to install the bolt for the seat, you're going to need a spanner, as the rail now covers the bolt hole. Lucky you if you have a set of ratchet spanners!
The rear inner is the only one that needs a new hole drilling, as it's not quite in the right place.
The measurement I've taken, is 4th hole down, 5mm towards the outside edge, 10mm down.

You can see the scratched hole mark.
This means the pointy part of the foot will foul the metal bracket holding the plastic seat connectors, so you will need to nip the end off to make it flush.

thus:
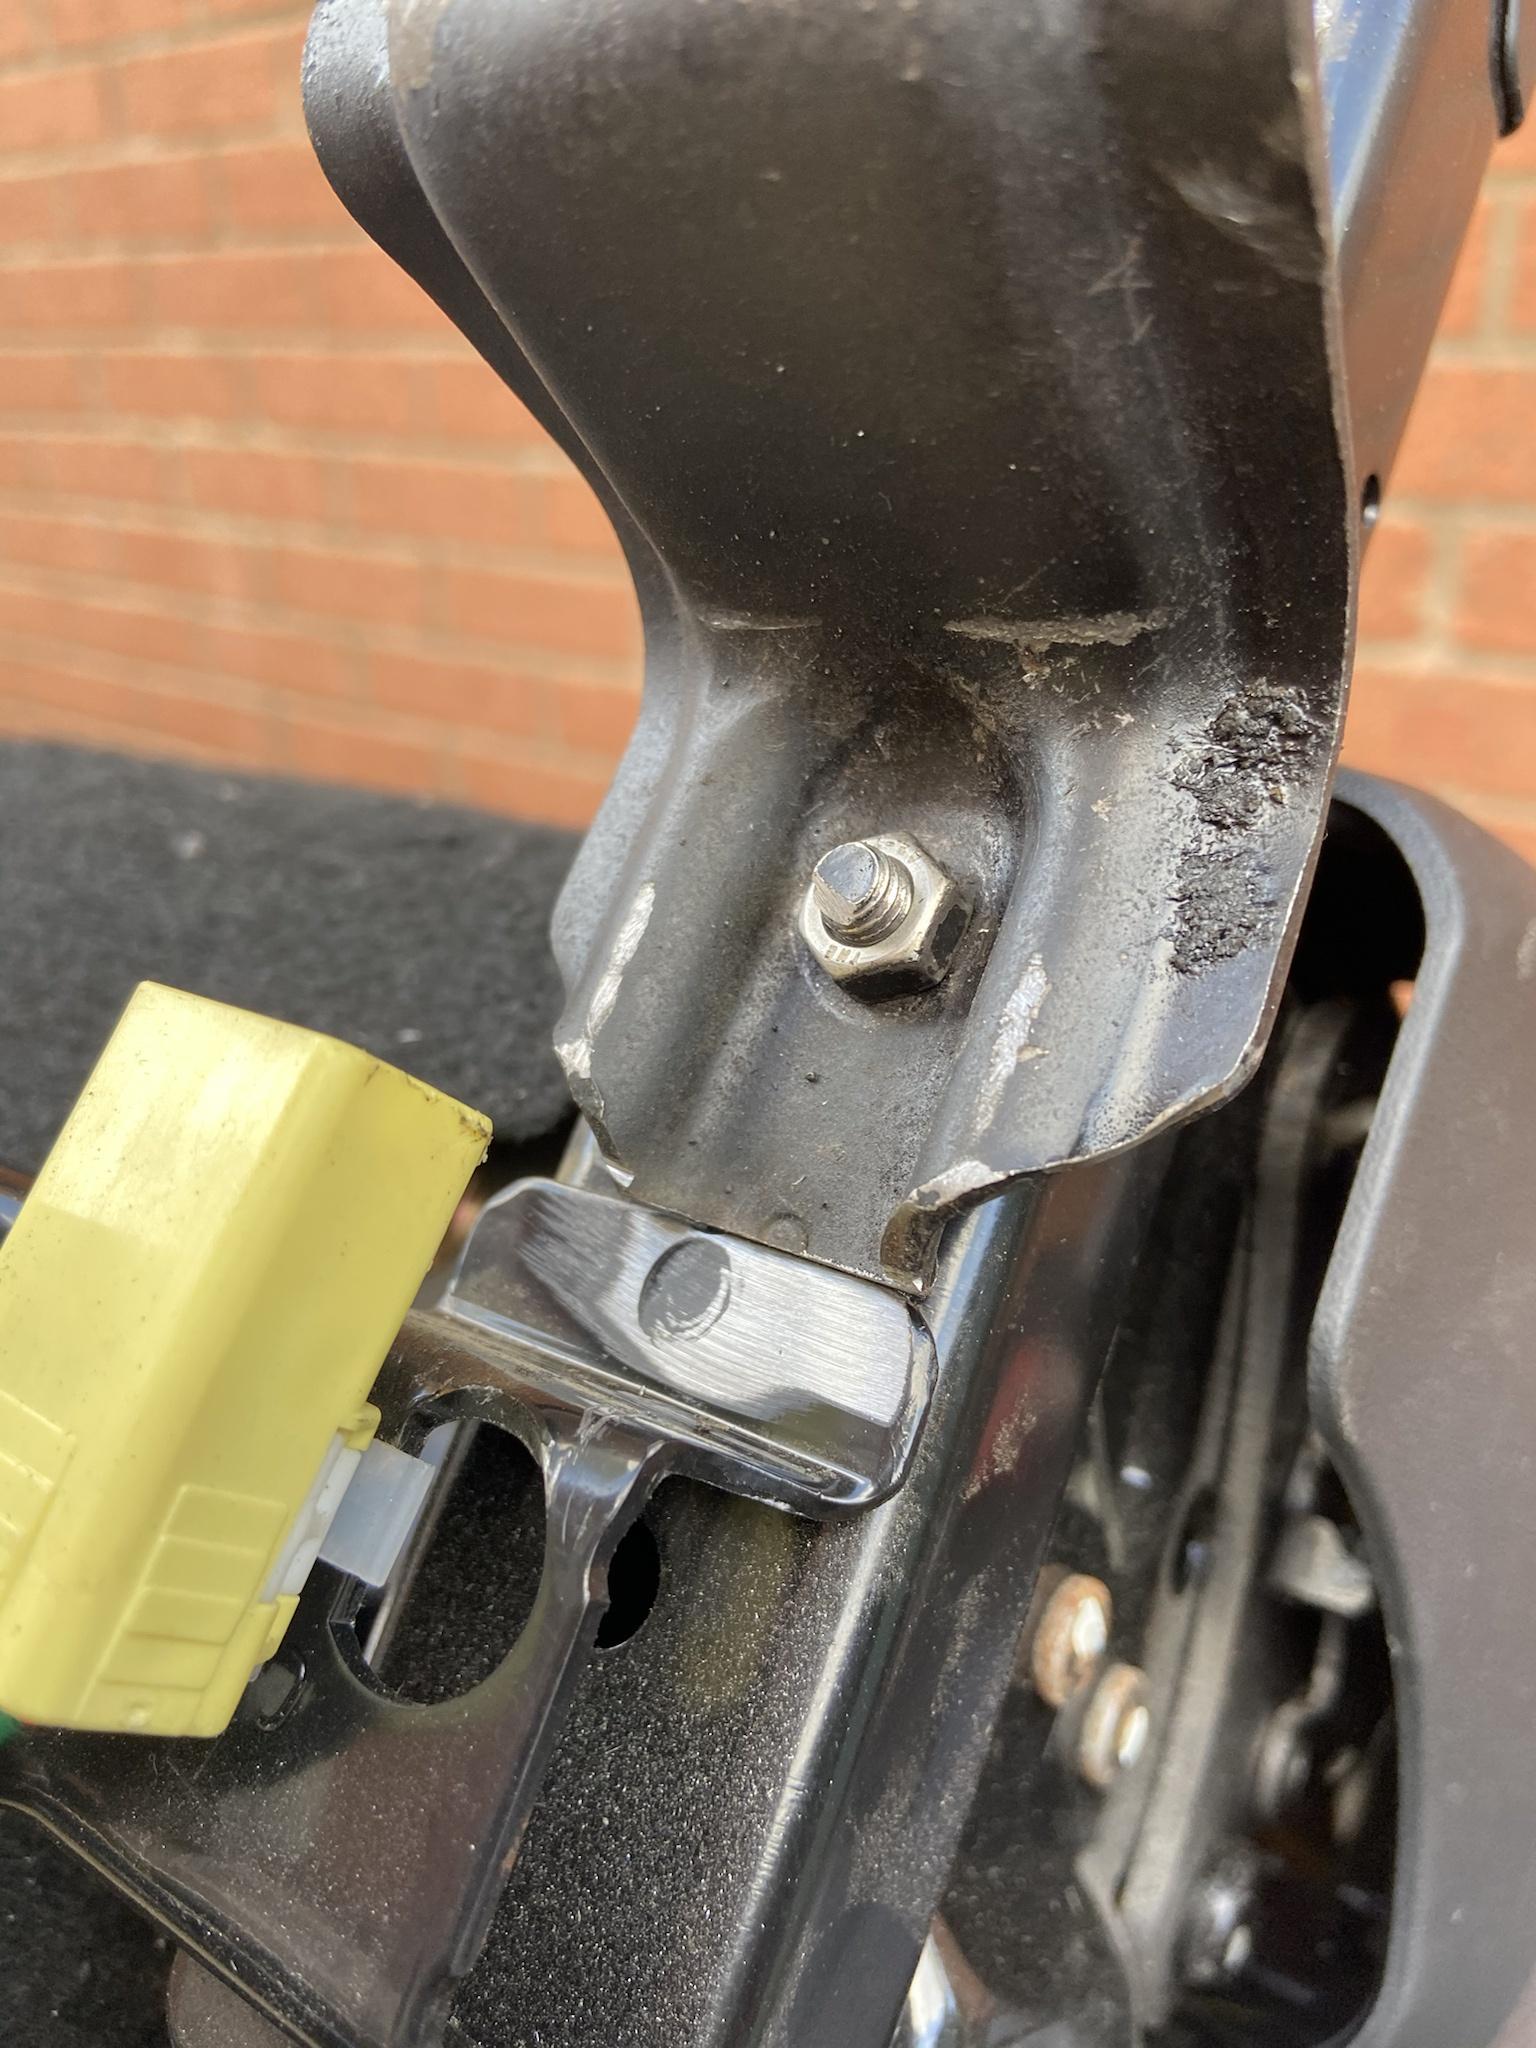
You can see I've already flapped off the paint ready to throw a bead of weld onto each foot.
Test Fit
The trick to getting these in the car, is headrest first, over the center, and then rails in and down, tilting it upright. Don't try and put the rails in first or they won't clear the door edge.
OR take your targa tops off...
When they are in, put all the bolts in loosely, trying not to thread them. Give them a bit of grease too to ease penetration.

Forgive my weird bolts, they are what were installed in the car when it came into my possession. I believe it had bucket seats on rails and then the original seats we're 'thrown' back in before it was sold.


You can see here the requirement of a ratchet spanner.

You'll have most likely needed to tweak the seat to get it to sit nicely, this is why the welder hasn't been used yet. But now the seat is bolted down, and settled (make sure to sit on it and wiggle around a bit to 'seat' the seat. )
Unbolt it gently, and trying not to move anything, remove it from the car. Drape a few damp towels, that you're missus doesn't like!, over the seat parts that might get splattered by weld slag.
Weld a few beads on the edges of the feet, in the same place they were on the MK1 feet. No need for massive seams all the way around, but if you feel like it, go crazy. Just be careful of getting any slag on the seats or into the foam, and do it in stitches so you don't evaporate the grease, and warp the rails.
I've not got any shots of me welding these, as I was too excited to get it back in car.
But here is some shots of the mk2 seat welds to show you what's required:


Then, scrape off any flux / splatter and hit them with a lick of paint.
You can then bolt it back in the car if you wish, but I would hold off for now and wait for Part 2 - The drivers side & Electronics! Which will be uploaded next week.
If you aren't interested in heated seats, then I think you're safe to install the seat now.

Last edited by LawrenceSelly; 22-03-2021 at 22:15.
Reason: added links to required items
Tags for this Thread
 Posting Permissions
- You may not post new threads
- You may not post replies
- You may not post attachments
- You may not edit your posts
-
Forum Rules


 Reply With Quote