Page 2 of 7 FirstFirst 123456 ... LastLast
Results 11 to 20 of 70

Thread: The 1.5 - Back to the future.

  1. #11
    Actually quite like the look of that kit on the red car...

    But I'm sure this build will still be quality...
    of course I dont care, your a muppet!!!

  2. #12
    Quote Originally Posted by Paul Woods View Post
    Thanks Chris but I have every file, pic and article I've ever written on my hard drive, Yewtree left that part alone.

    Jon I am keeping things relatively stock with the rev3 motor, aiming for reliability over all out performance, in effect a "stock" 1.5 as the factory might have intended.

    I am going for our tried and tested SC location intercooler above the gearbox, it gets loads of cool air blasting up from underneath the car in that area and not directly over the engine, I am not a fan of the Gt4 chargewarmer but it does have its uses when space is tight, I am using the chargewarmer on the Mk3 3s-gte build but purely for space restriction reasons. I also don't like the added weight of the chargewarmer, pipes, pump, cinq rad, all of that coolant etc

    This is what I am going for, a recent customers 1.5 build but in a more OEM colour scheme, this setup just makes everything so compact.

    Paul, what intercooler is that from or what brand is it?

  3. #13
    Woodsport Paul Woods's Avatar
    Join Date
    Mar 2005
    Location
    Durham, UK birthplace of the 1.5,v6 and v8 Mr2
    Posts
    14,617

    TB Quote of the month:"I split my ear open whilst masturbating" - Jasper Full story Here

  4. #14
    And they are just as efficient as standard?

  5. #15
    Woodsport Paul Woods's Avatar
    Join Date
    Mar 2005
    Location
    Durham, UK birthplace of the 1.5,v6 and v8 Mr2
    Posts
    14,617
    They're better than stock, larger core.

    TB Quote of the month:"I split my ear open whilst masturbating" - Jasper Full story Here

  6. #16

  7. #17
    Woodsport Paul Woods's Avatar
    Join Date
    Mar 2005
    Location
    Durham, UK birthplace of the 1.5,v6 and v8 Mr2
    Posts
    14,617
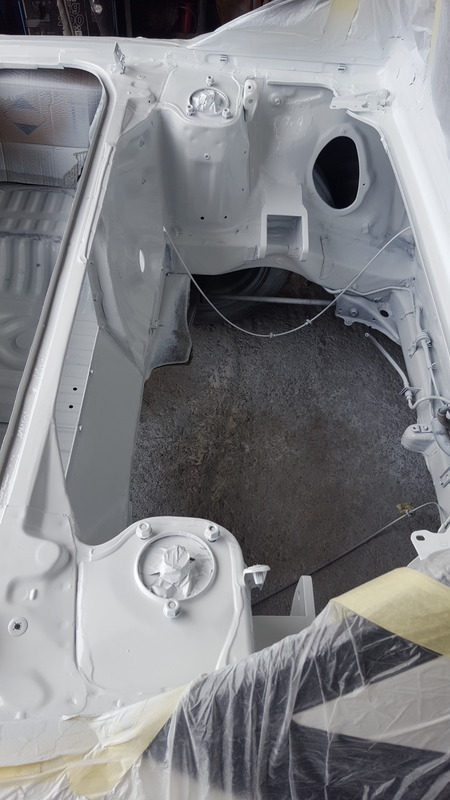
    With the bay fabrication done it was all seam sealed and several coats of primer and 2k white applied we have a dazzling clean bay.


    TB Quote of the month:"I split my ear open whilst masturbating" - Jasper Full story Here

  8. #18
    Looks good Paul.

    I'm going to have a go at spraying my engine bay at the weekend.

    Got any tips? Your's looks a lot more "stripped" than mine, so I will start there.

    How do you spray it? From the outside? or do you stand in the middle and try not to touch anything XD

  9. #19
    Woodsport Paul Woods's Avatar
    Join Date
    Mar 2005
    Location
    Durham, UK birthplace of the 1.5,v6 and v8 Mr2
    Posts
    14,617
    A combination of both to be honest, there are some areas you just have to get in the bay to access with the spray gun.

    I recommend cellulose primer coat first, engine bays are full of horribleness even after steam cleaning, lots of paint reactions will happen if celly primer is not laid down. I also like using stonechip on the more rugged areas, it forms a nice rubberized layer for great protection, also good for flattening out crap looking bits.

    On this bay I have relocated the fusebox to the boot and run the harness through the NS quarter panel, so no wires at all will be in the engine bay=super clean.

    TB Quote of the month:"I split my ear open whilst masturbating" - Jasper Full story Here

  10. #20
    Awesome cheers, I will get stuck in,.

    And that is a good idea! I was thinking of making a cover for mine using some carbon fiber or something. Hide all the wires at once.

    I've already hit it with a coat of stonechip around the hard hit areas, so I will crack on with that this evening so its dry ready for the weekend.

    Cheers again!

Page 2 of 7 FirstFirst 123456 ... LastLast

Posting Permissions

  • You may not post new threads
  • You may not post replies
  • You may not post attachments
  • You may not edit your posts
  •