-
yep as said, very nice colour. **thumbsup**
-

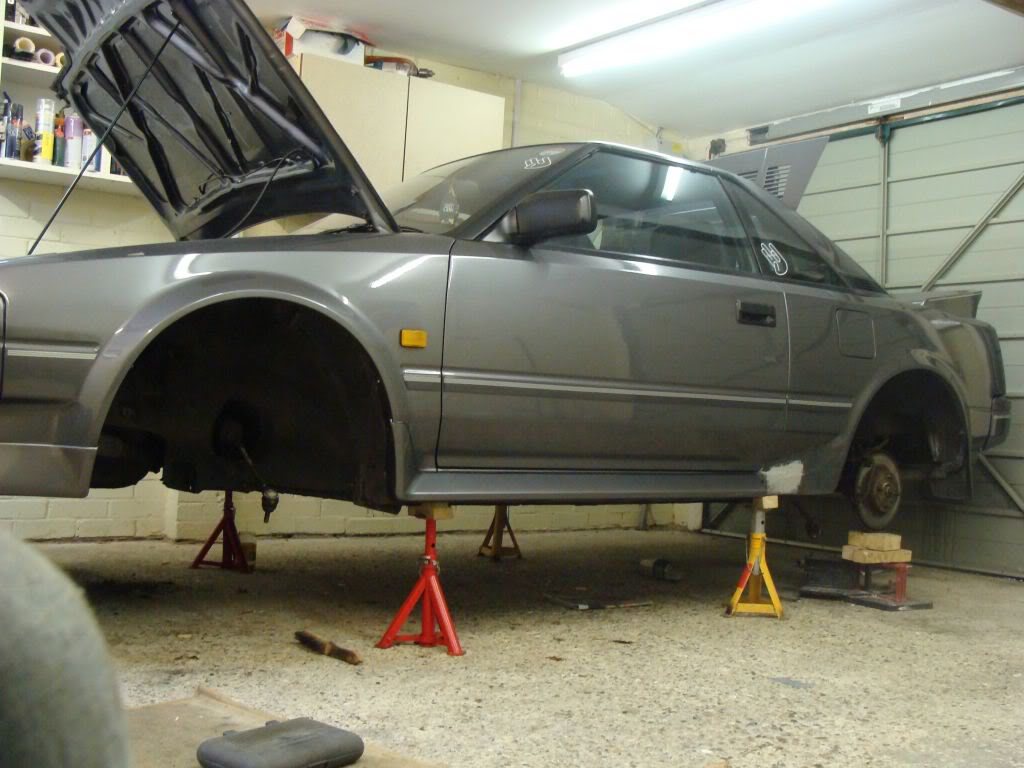
Hi all, I thought I should keep this thread updated with the work I have been doing on the car (although there are a couple of bits I forgot to take pictures of already!). My previous approach to rust repairs has either been "ignore it" or "paint kurust on and patch it up with fibreglass". Many of you may know that both of these approaches are equally effective. I read a massive thread on retrorides about making repair panels, where some old boy showed how you could use basic tools to turn flat steel sheet into proper, factory looking patch panels to replace rusty bits. I thought this AW11 was way too nice to bodge, so I decided to be brave and give it a go. I had already got all the suspension stripped off the car within a week of getting it home:
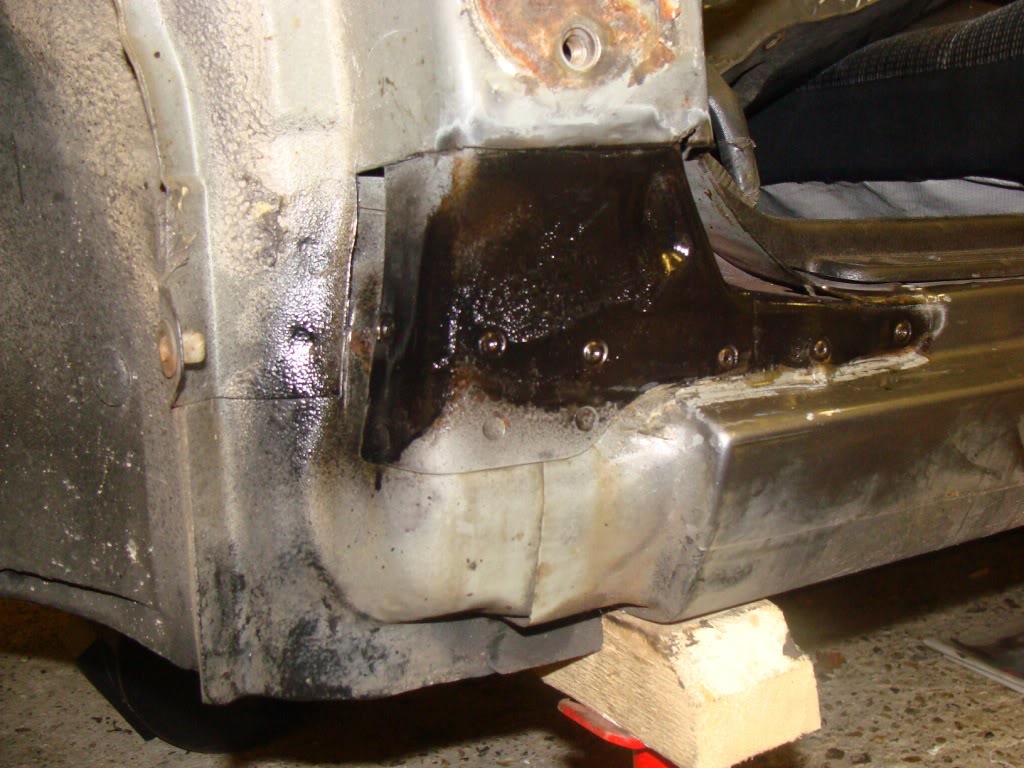
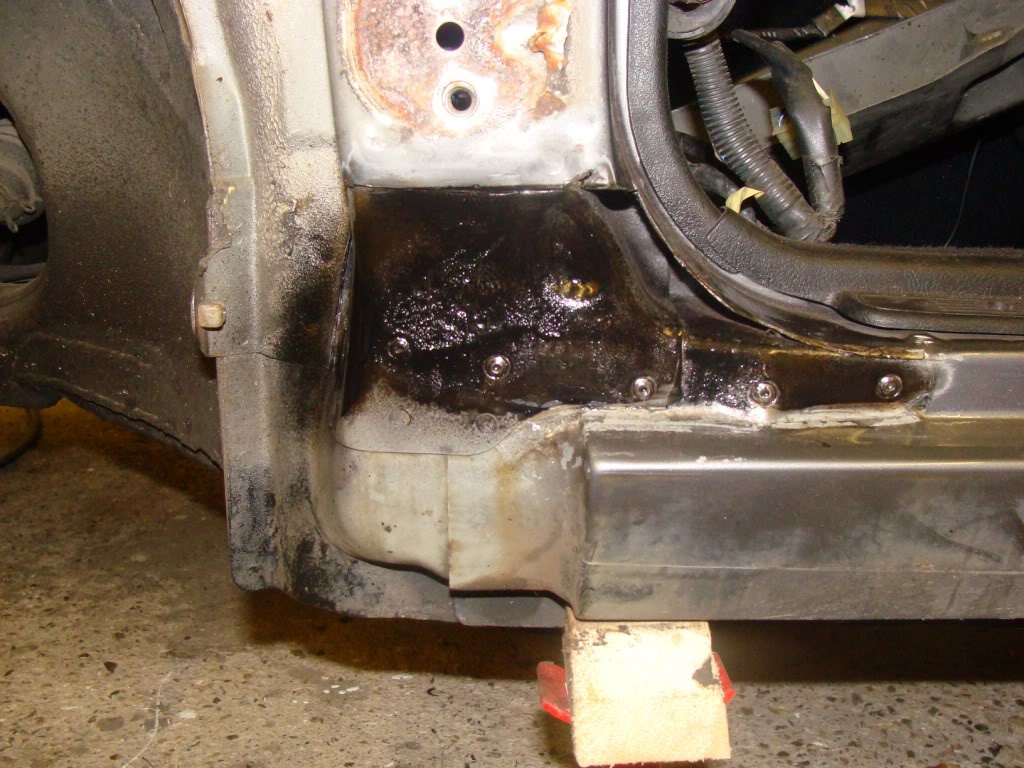
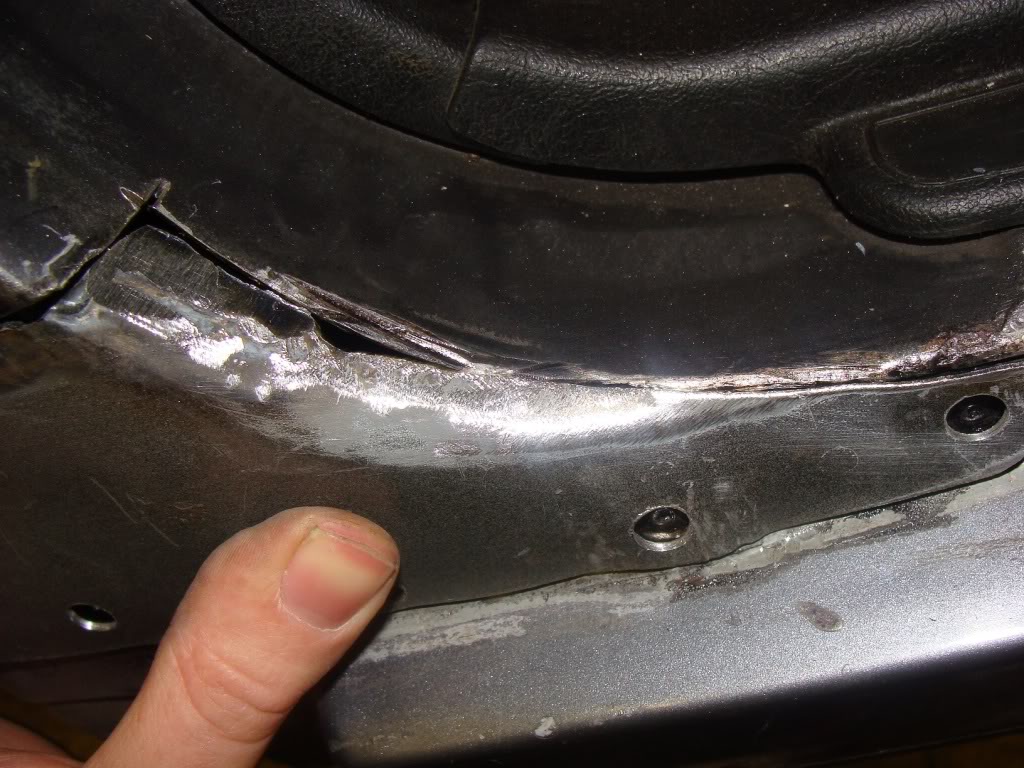
So my next step was to take the front wing and door off, and investigate the rust hole in the passenger side A-pillar. I stared at it for a good while, before firing up the angle grinder and slicing the offending chunk out with a 1mm disc. Gently does it! I also drilled out the spot welds along the bottom edge, hadn't done this before either, but it was very easy. I even made my own spot weld bit for extra man points.
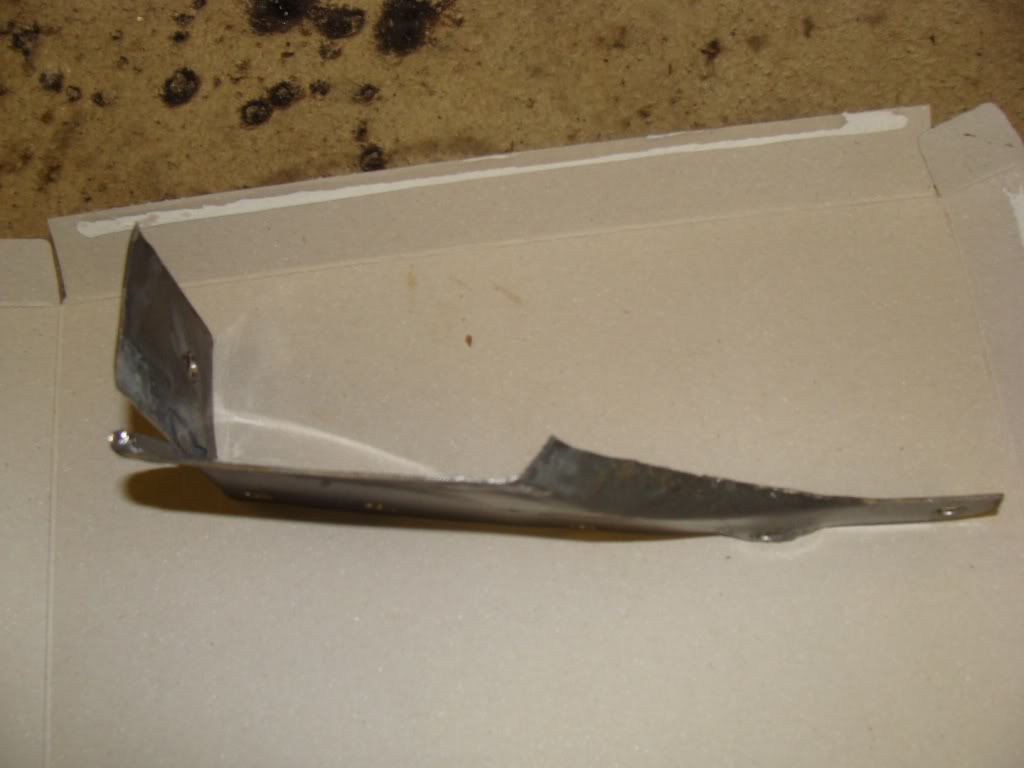
Then I made a card template that showed all the bends etc, and cut this about until I could make it fit just right. I couldn't use the old metal as a template because it fell to pieces as I cut it off. Here is the old metal, and the new piece I made. At this stage I had just put some bends into it, using the vice and a rubber mallet for the long, straight bends, and a 3/8" drive extension bar for the radiused right-angled bend.

Then I had to bend it inwards along the curved profile. It goes from 90 degrees fold at the top, to nothing at the bottom.I found the easiest way to do this was with some mole grips.
As I was bending this little bit over though, it was warping the panel in the other direction. The solution was to stretch the folded over part, which I did by belting it with the wedge end of a ball pein hammer. This thins the metal, and spreads it out, and brought the panel back to being flat. I used the same technique to put a little raised channel in the bottom edge, to match the contours underneath.
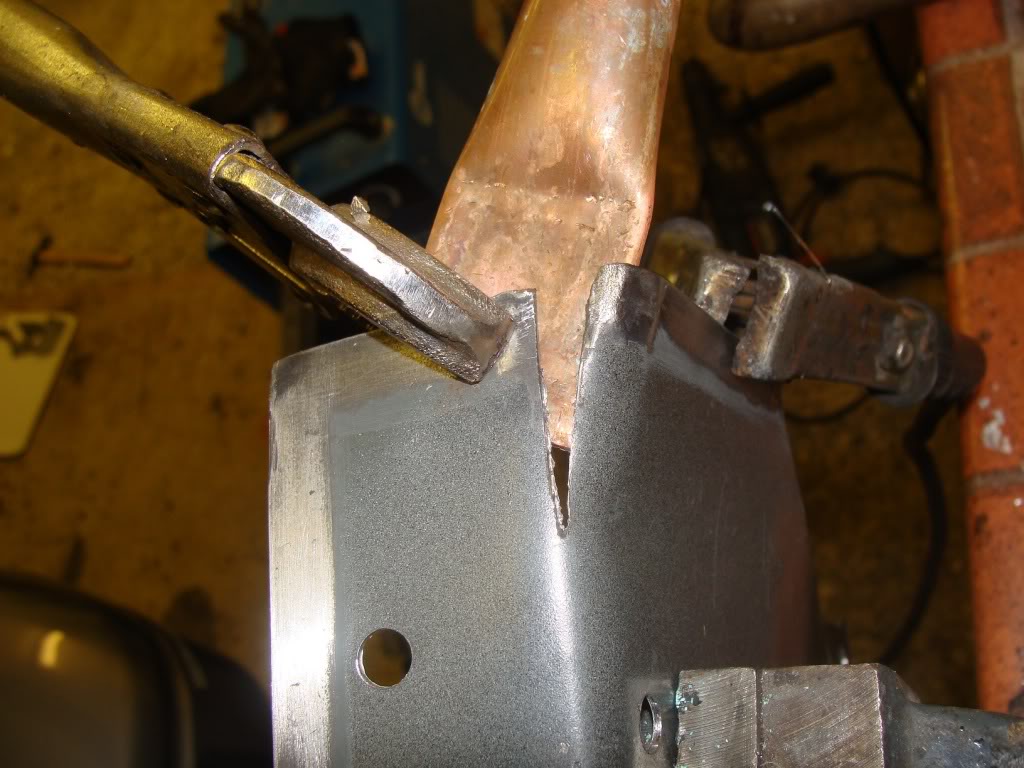
As you can probably see in the photos, to get the top edge of the panel to bend outwards, I had to cut down the length of the radius bend. I thought about making this bit work by stretching as well, but I would have ended up with metal too thin to weld to I reckon. Instead, I used another new technique I read about. I flattened out a bit of copper pipe, and used this as a backstop to weld against. The steel weld won't stick to the copper, so you end up with a nice flat profile on the reverse. It stops the heat building up and melting the edges of the panel as well.
After welding (front)
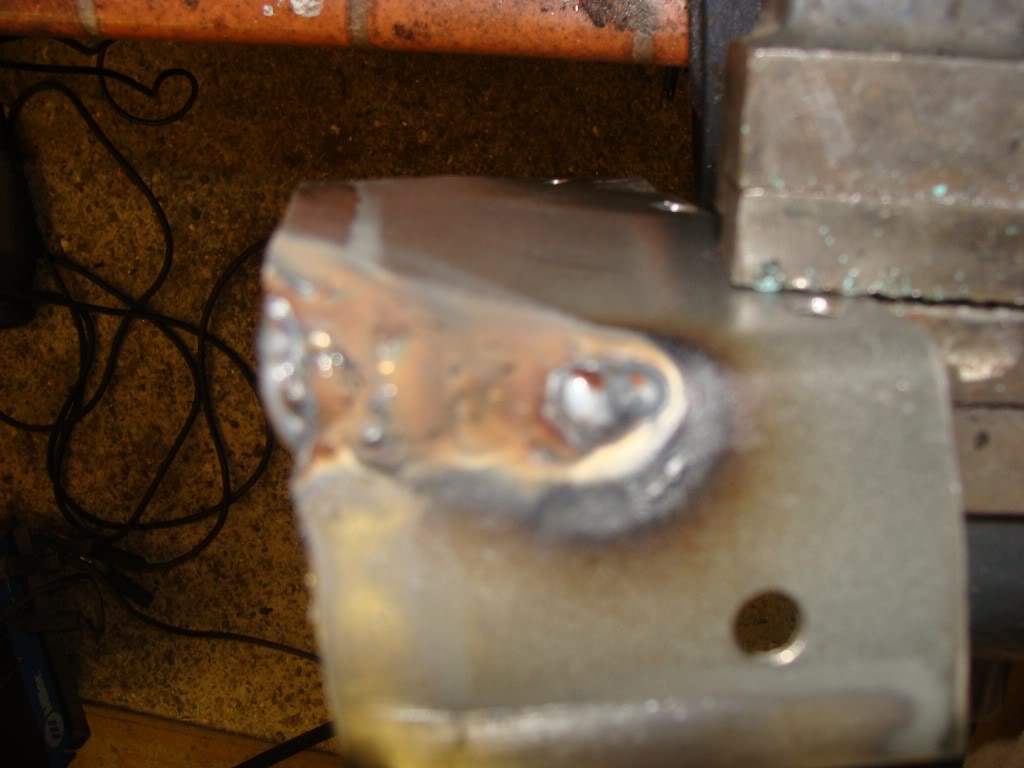
Reverse
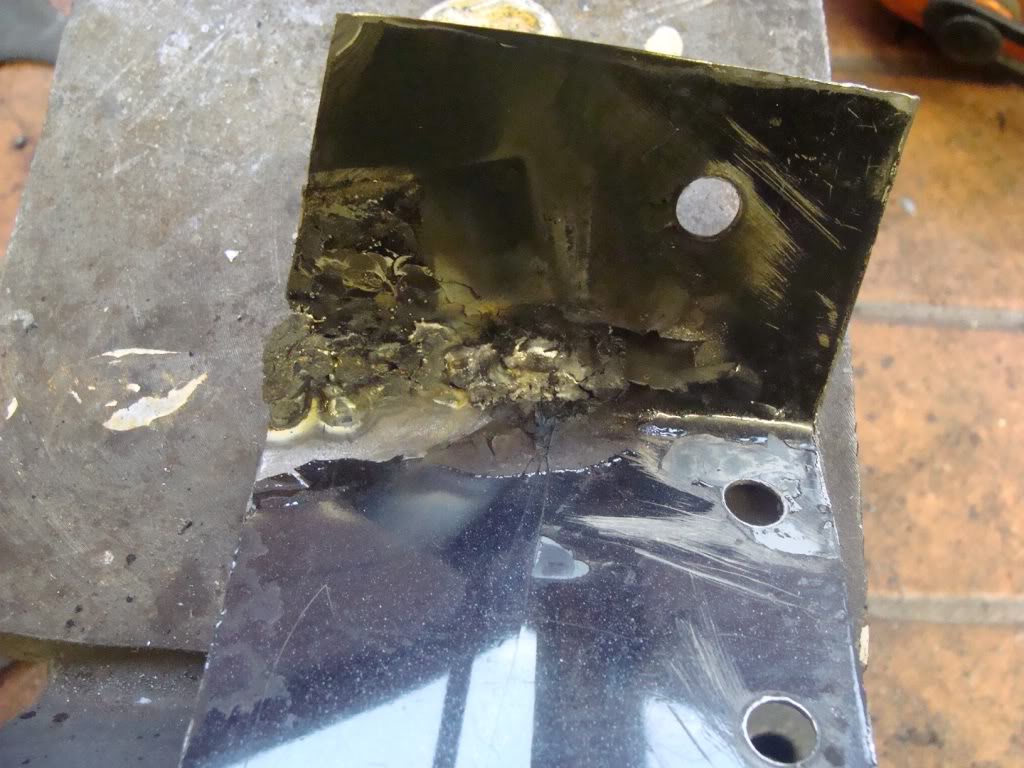
And offering it up after dressing the front with a grinder
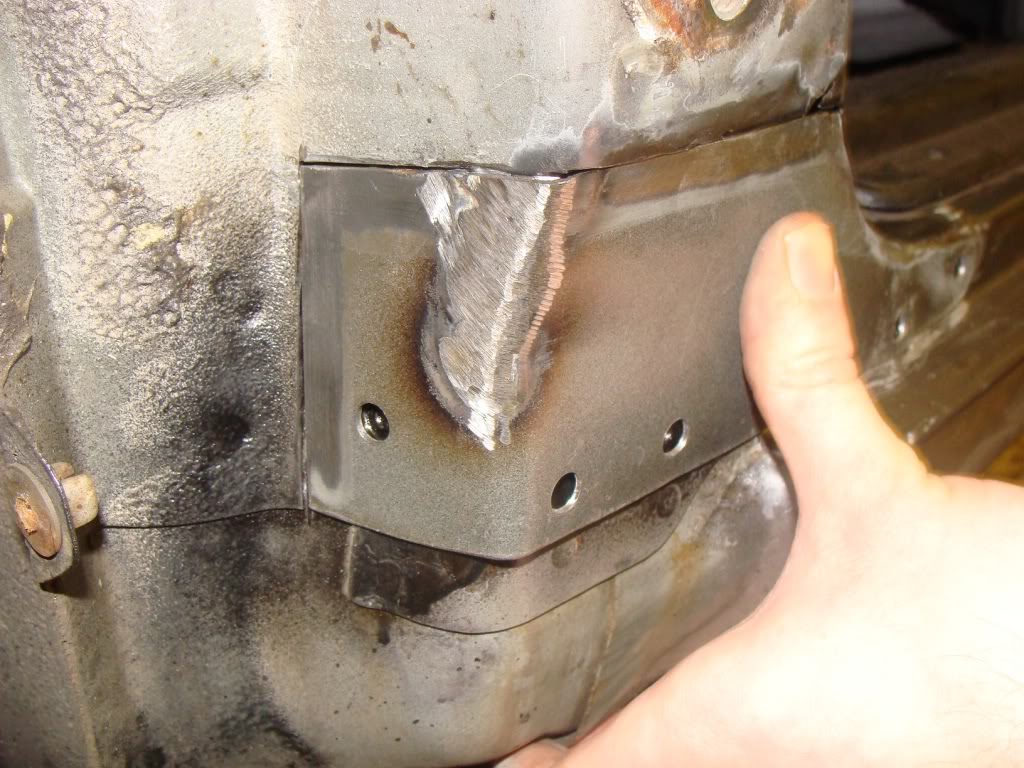
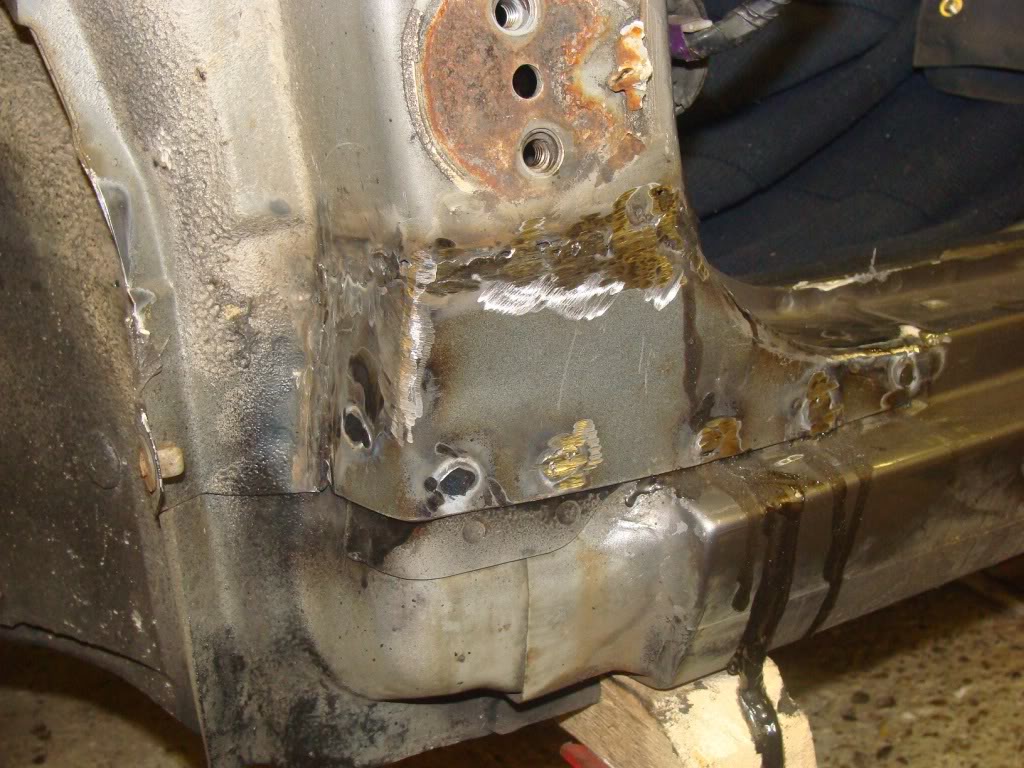
After much dicking about, I finally got it to fit pretty well, so I welded it in place. Lots of tack welds, then gradually join them up, trying to avoid warping anything with heat, or setting the car on fire. The old spotweld locations are pool welded to the sheet behind. I need to work on my butt welding (snort); I'm sure I used to be able to get nice flush welds which needed a light grind, but these are ugly and raised. Strong though!

Note how all my carefully applied Dinitrol is leaking all over the garage floor! Will have to redo this now but I found another way to get the nozzle in so that's fine. Next grind back the welds, and prime it. I only had time for a swift attack with a grinding wheel, and it might be a week before I can work on it again, so I did what I could and sprayed it to stop it rusting up. Next playtime I get, I will weld up any pinholes, go back over it with a flapper disc, and use high-build primer to get it looking perfect.
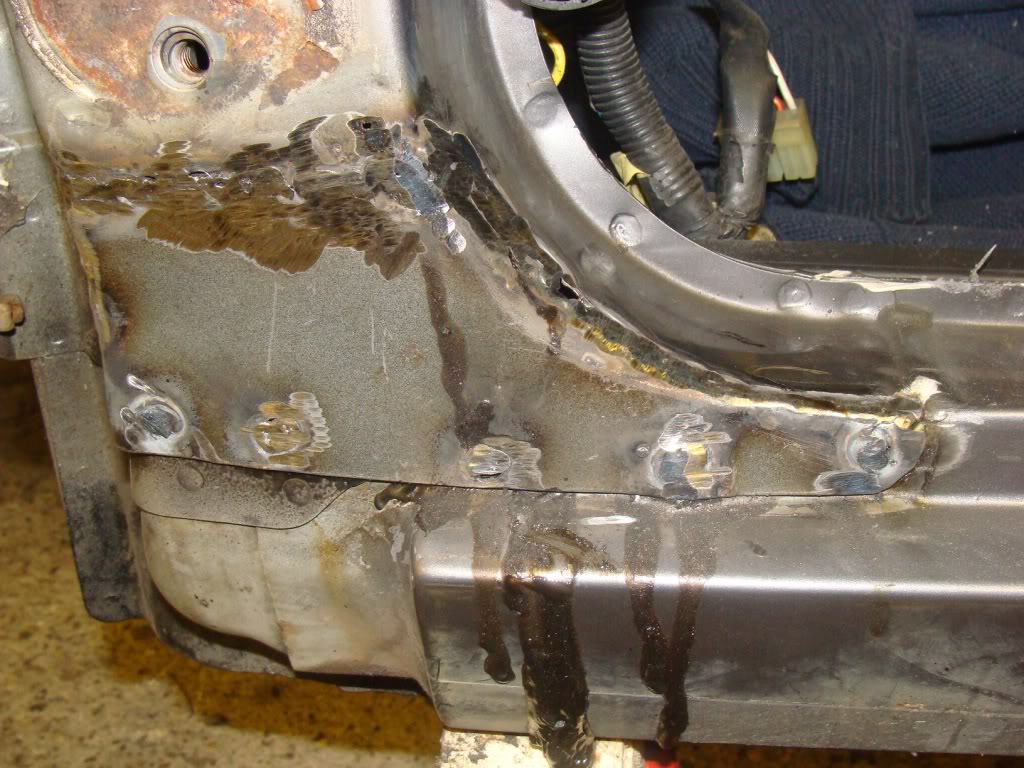

I'm sure some of you guys could do this in an afternoon, but this was my first attempt and I thought it might be helpful for people to see the whole process. I deliberately started on a low-visibility section, but tried my best to get it fitting exactly right. The profile is not quite right, but I am confident the door will seal against it which is the main thing! Looking at the drivers side, I can see that has also been repaired in the past, I might re-do that as well for the hell of it - hopefully it won't take me twenty hours for one patch the second time around!
-
That looks pretty good mate.
Pat rebuilt his sills last year, spent a while doing it but when he had finished they looked quite respectable.
Worth taking your time and polishing your skills a bit though!
Chris.
-
`A little update on this project . . . . I lugged this thing home for it today :thumbsup:
-
The best thing you've ever bought mate :thumbsup:
 TB Quote of the month:"I split my ear open whilst masturbating" - Jasper Full story Here
-
I did a lot of worrying about what immobiliser/transponder stuff I needed from the donor, as I didn't want to end up with a dead engine. Got there today armed with printouts from manuals etc to locate all the bits, and a photo which Paul had kindly taken that showed everything I needed to make it run. I stripped the plastic off the ignition barrel, found some wires where the transponder pickup coil should be, unclipped them, and found I was holding . . . a small green bulb that illuminates the keyhole. No transponder coil, no immobiliser ECU, and just a dumb key with no transponder in it! Hooray, I have found a non-immobiliser equipped one by accident!
The engine is from a jap import RX300/Harrier (only 74k miles/km!) with a busted gearbox, hooray for their low crime rate as that's one less thing to go wrong on the wiring front. Just hope that I can find the time/money to buy the other bits I need and get it installed.
-
You jammy twat! No immobiliser, that's saved you some grief.
TB Quote of the month:"I split my ear open whilst masturbating" - Jasper Full story Here
-
Unless I just couldn't find it, in which case I've dropped £££ on a 200kg paperweight :fingersx:
Is there any way I could 100% guarantee it from the ECU part number? Seriously, I ripped the whole dash out of that thing looking for immobiliser stuff, but I am just totally paranoid about it now 
-
That is one lump of engine :icon_smile:
I feel this thread is going to get more interesting.
-
Adam give me the Ecu part number and I'll double check, but if it came from a Harrier it won't have an immobiliser, my daily driver is a Harrier.
TB Quote of the month:"I split my ear open whilst masturbating" - Jasper Full story Here
 Posting Permissions
- You may not post new threads
- You may not post replies
- You may not post attachments
- You may not edit your posts
-
Forum Rules


 Reply With Quote