Page 11 of 13 FirstFirst ... 78910111213 LastLast
Results 101 to 110 of 125

Thread: mk3 LSD diffs in a S54 box

  1. #101
    Woodsport Paul Woods's Avatar
    Join Date
    Mar 2005
    Location
    Durham, UK birthplace of the 1.5,v6 and v8 Mr2
    Posts
    14,617
    Hey no probs, hopefully the guide doesn't make it look too easy, guides have a habit of doing that, I cannot stress enough how tricky this can be to do. I'd rather it was an eye opener and prevented someone trashing a good box, but on the other hand it could be a useful guide for the more experienced builder.

    I will also do a mk3 diff removal guide, I have a shortcut that gets the diff out in 3 minutes, no shit!

    TB Quote of the month:"I split my ear open whilst masturbating" - Jasper Full story Here

  2. #102
    Quote Originally Posted by Paul Woods View Post
    I will also do a mk3 diff removal guide, I have a shortcut that gets the diff out in 3 minutes, no shit!
    Brilliant, this would be a help on it's own Paul, a gearbox full of HobNobs will be on it's way to you if I get it done.

    “Where I'm going is not nearly as important as what I'm driving to get there.”
    ― Jay Leno

  3. #103
    John,

    Not sure what your plans are but you are welcome to bench the gearboxes here if you want somewhere to work on them. Just let me know.

    I could probably come and pick them up too if you need.

    I'm also happy to watch / HF your coat!

    Chris.

  4. #104
    Quote Originally Posted by cdwood2010 View Post
    John,

    Not sure what your plans are but you are welcome to bench the gearboxes here if you want somewhere to work on them. Just let me know.

    I could probably come and pick them up too if you need.
    Chris.
    Cheers, thanks a bunch Chris :thumbsup: this does make life easier.

    My intention was to build the gearbox with the lead-in time I have so it would speed up the build as I really would like the 5th Gear extension, but now I can give it a shot at your place.

    If I can pick up the MK3 gearbox this weekend and get the diff out of it, I shouldn't have too much trouble bringing the replacement rev 5 gearbox with me but lets see how it goes.
    Last edited by Torero; 14-02-2012 at 22:18.

    “Where I'm going is not nearly as important as what I'm driving to get there.”
    ― Jay Leno

  5. #105
    Hi Paul,

    Did you by any chance made some pictures when swapping that diff?
    Maby i could spot somthing on those pics wich i did diffrent while reassembling my box.

  6. #106
    Woodsport Paul Woods's Avatar
    Join Date
    Mar 2005
    Location
    Durham, UK birthplace of the 1.5,v6 and v8 Mr2
    Posts
    14,617
    Ok bear with me chaps, this is the definitive Mk3 LSD into S54 install guide, i'm going to have to bite this sucker off in chunks because it's a little more indepth than i was planning, there's 50 pics alone just stripping the box down and fitting the LSD without the rebuild!

    Hang on to your hats....

    Start with one S54 box, it doesn't matter which revision, but if you're using a Rev1 and want to also fit the extended 5th gear mod i discovered you will need a rev2- box or rev2- synchro parts, but for now this guide concentrates on the Mk3 LSD fitment.

    Be aware this requires specialist tools, most of which i made myself specifically to do this job, you will also require jumbo coconut balls as many try this and fail resulting in a junk gearbox, you have been warned! With that out of the way hopefully this serves as a good guide for the more experienced among you.

    Start by removing the two bolts circled below and remove the selector arm....


    Now remove the 12mm nut and knock the clevis pin out, then remove the selector fork, how seized this is depends, some pull off by hand, others require heat...


    Here is the fork removed...


    Using a big fuck off spanner (can't remember its actual size, just the BFOS) undo the selector housing end cap...


    Make sure the box is in neutral, remove the selector detent...


    Slide the selector assembly out...


    Tip the gearbox on end and inside the bellhousing there are two 12mm bolts, remove them.


    With the gearbox back on its base remove the eight 12mm bolts from the 5th gear casing...


    With the casing off, remove the circlip on top of the synchro hub (sorry forgot to take pic!, but it's obvious) , remove the 12mm bolt from the selector fork and use a puller to pull the 5th gear synchro hub assembly off, i made this one which consists of 3 bolts that screw into the hub and a captive centre bolt to press against the shaft...


    Close up of the tool... (wish i had a pic of Phil right now)


    With the 5th gear synchro hub off the 5th gear lifts off by hand...


    Now remove the bearing, it splits in two halves...


    Now remove the spacer ring...


    Here it is removed....


    I use a windy gun for this part, never found anything else that works, just remember the nut is left hand thread...


    With the nut off you need a puller to remove 5th driven gear....


    With both 5 gears off you need to remove the base plate, 5 bolts hold this down...


    Plate removed...


    There are two circlips on each shaft, remove them...


    Now remove the reverse idler securing bolt on the side of the gearbox...


    Now remove all of the casing bolts onto the bellhousing, there's lots of them, how's that for technical.


    Now tap the casing upward with a chisel or punch in several places around the casing, once it comes off the dowels it will move easily....


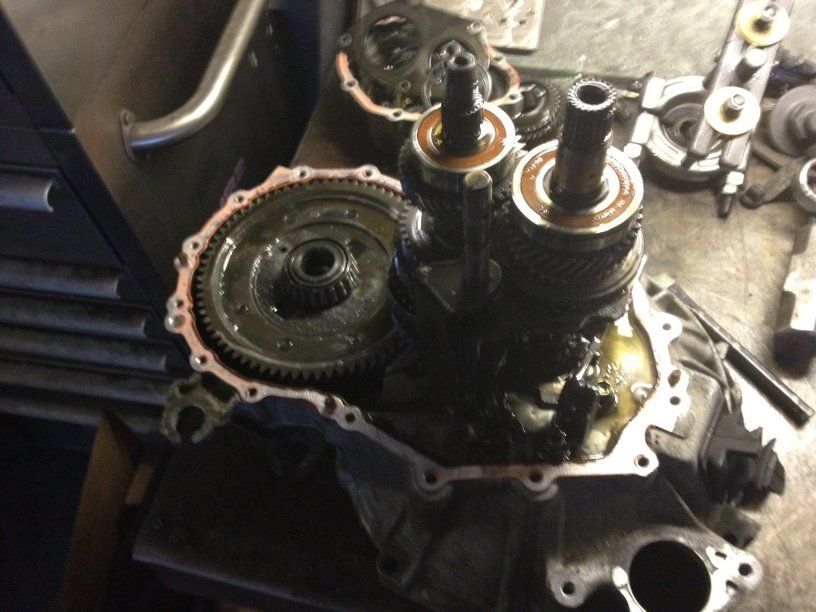
    Now we're in! oooh scary coggy things....


    Remove the reverse idler cog and shaft...


    Flick book style, shoulda took more pics, nailed them all together and made a movie...


    Remove this bolt on the reverse selector....


    Now a tricky bit, lift the 5th/reverse selector fork upward, this will let the reverse arm clear the second bolt you need to remove...


    Here's a shortcut to getting the diff out, no need to dismantle the entire selector assembly, just lever the whole gearset up about 20mm and the diff will slide out...


    With the diff out we need to safely remove the two bearings for reuse, you can fit new bearings at this point and skip this stage, but you will need to adjust the preload shims in the casing, which requires even more specialist tools and is a pain, trust me, you really want to reuse these!


    Important tip, these bearings are sided, do not fuck this up! If you mix them up and they go back on the wrong side (50/50 chance!) then you're screwed.

    Now excuse me while i'm very unprofessional for a bit, but i had to make the tool that removed these bearings, i'm sure Toyotas SST is for sale somewhere but i couldn't find it, they probably want a gazillion pounds for it anyway. So my tool works (so Becky says) but i have no option but to cut off the old speedo cog to get my puller behind it. Answers on a postcard if you find a better way but i cannot. This cog will need to be renewed, it's about £25. DO NOT use the Mk3 speedo cog, you will end up with your clocks reading KMH! Only the grey S54 cog must be used.


    With the speedo cog off there is now room for the puller to sit behind the bearing...


    I made a spigot that sits inside the diff for pulling against...


    Here is my hydraulic puller with custom made arms in place...


    And i have a special C clamp that stops it springing off...


    Same proceedure on the other bearing...


    The bearings removed, keep these in order! They do not swap and are handed.


    Now remove the S54 crownwheel, 8 bolts and a tap with a hammer sees that off....we need to fit that onto the Mk3 diff.


    Crownwheel removed, look it's almost 3D!


    Remove the Mk3 bearings and speedo cog, be as rough as you like, you don't need them.


    Fit the new Mk2 speedo cog first...


    Then tap the Mk2 bearing into place...


    You won't get it all the way home, so use an old bearing race to squeeze it home in the vice, be careful not to catch the outer cage.


    Same on the other end....


    With the bearings fitted you can install the Mk2 crownwheel...


    The new diff is now ready to install, prize the gearset up as before and slide the new diff into the box...


    That's all for now, i will continue this write up tomorrow when i assemble the rest of the gearbox, nighty night.

    Part two...

    With the LSD installed it's time to rebuild the box, refit the reverse gear idler assembly, it's the same as removal except in reverse, boom tish i'm here all week...


    Now an important bit, you must align the reverse idler gear with the pointy bit on the casing...


    This is so the bolt hole aligns with the hole in the casing.

    Now clean the casing surface, and use a solvent or degreaser to get rid of any residue...


    Do the same thing with the other side of the casing...


    Now apply sealant to the casing, i use Sikaflex, but Tigerseal or any other sealant will do.


    Plop the casing back on, it should tap home very easily, if you need to use excessive force you've done something wrong...


    Immediately check for reverse idler alignment...


    I was off by half a hole, bring it into line with a screwdriver...


    Insert the bolt...


    Block the diff hole, it's not nice having something fall in there, you're back to square one and it will all need to come apart again, trust me i know! Also refit all of the casing bolts and tighten evenly.


    Clean the top casing surface, again use a solvent.


    Screw the nut on the driven shaft by a few turns and use that to lever the shaft up, this will allow you to fit the circlip...


    With both circlips fitted refit the top plate, at no point allow the selector shaft sticking up to rotate.


    Put the spacer ring back on the input shaft...


    A reminder of the driven gear part number for the extended mod...


    Tap the gear home, an old socket and hammer, nothing technical...


    A reminder of the 5th gear part number...


    Apply grease to the bearing and place it on the shaft, the grease holds the bearing nothing more...


    Take the synchro hub assembly and place it on the cog, four holes align with four pegs...


    This is how the 5th gear assembly must be installed, as one unit, if you try to fit the gear first then the hub the lower spring clip will fall out, not good.
    Last edited by Paul Woods; 29-02-2012 at 07:25.

    TB Quote of the month:"I split my ear open whilst masturbating" - Jasper Full story Here

  7. #107
    Holy crap, that is awesome Paul, thanks for taking the time to do that!

    It makes me want to take my gearbox back out and get it in bits!

    :)

    Chris.

  8. #108
    brillo pads mate. what box does the 2gr swap in the mk3 use?
    Last edited by adamh; 27-02-2012 at 22:31.
    ......in the bluecorner , fighting out of japan....

  9. #109
    That's easy only the turbo box can handle the 2gr engine, I think it would destroy the na box quite quickly.

  10. #110
    Sweet! Nice write up paul, i might have to start looking for a broken down mk3


Page 11 of 13 FirstFirst ... 78910111213 LastLast

Tags for this Thread

Posting Permissions

  • You may not post new threads
  • You may not post replies
  • You may not post attachments
  • You may not edit your posts
  •